
What on earth is the point of changing the stern on an old Nethercott, especially as I think the bow area is the bigger problem speed wise. Well its all about trying to make some more informed decisions. There's a lot of variety in hull shapes on the new development ICs, and one of the more obvious variations is in the treatment of the aft run. Now, not being one of the worlds most naturally gifted helms I do tend to let my Canoe fall over more often than I should in a breeze. Some of the new boats - most notably the quick looking very low wetted area Morrison shape - seem to me to look distinctly tippy, being both narrower than the Nethercott and having rounder sections which is liable to make things worse/wetter. However another theme, particularly developed by Chris Maas in the USA, is of a wide and powerful, almost transom stern. If the wide stern and bouyancy aft add stability to counteract the loss of stability from a narrower beam then it may be that this will produce a boat I can sail as well - or no more badly - then the current one. So the object of this exercise is to add the powerful stern type to the Nethercott hull and see if there's a significant improvement in ease of handling, especially tacking in breeze. In most conditions I anticipate this implementation being a bit slower than the current shape because of increased wetted area, although there might be some benefit from pressure recovery in high displacement/low planing speeds. So this is a fairly quick and dirty attempt at trying out a different stern hull form, but without in any way compromising the existing structure so that the boat can readily be returned to a standard shape.
4th April 2011
No sailing last week, club maintenance day. This week started off with the first of our club pursuit series, with what I suppose was a not canoe-unfriendly course with a good long beat and a series of shorter downwind legs, which, if they didn't include much blast reaching, didn't include that much square running either most of the time. Wind was generally a decent F3, but with some lighter and stronger, and a lot of variation in direction under generous cumulus.
The Canoe was last to start by a mile, with the club's best - and very good - RS300 the previous starter. The boat was flying up the beats and not doing badly offwind, and soon started picking off competetitors, With about quarter of an hour to go (and the RS300 having departed with a broken tiller extension) I was beginning to fancy my chances, but the wind dropped some for the last lap and I wound up finishing third (with maybe three boat lengths covering the first three). The last legs turned out to be downwind and the short legs and 270 degree gybes made it difficult to pick off the last two: indeed I got through a Laser EPS once only to see him slip through again on a short square run where he could run by the lee and go much deeper and save a couple of gybes.
Still, very well pleased with that, and a couple of interesting races to follow.
The same conclusions as before are reinforced really: in conditions where a reasonable number of boats went swimming there were no capsizes and no really stuffed up tacks, plus a definite improvement in straight line speed which is noted by others, not just me. The flatter sternwave and rather lower bow were very evident in those conditions.
27th Feb 2011
Out again today (in the meantime its been migraine and family duty). Three races, first f1 ish, second F2-3, 3rd a good F3. Gusty and shifty (and rotten 'orrible drizzle/rain while packing the boat up).
Running down to the start in the very light she felt horribly sticky. With sufficient attention paid to trim and heel angle things were bearable, but definitely feels slow in those conditions. Sailed a **** poor first race and got the deserved handicap position. I knew it wasn't going to be my day when the "post-it" with the *very* complicated course written on fell off 30 secs before the gun and I had the choice of retrieving it and starting very late or sailing with no idea where I was going. I started over a minute late and that was it really. An awful lot of the race was pure displacement sailing.Once there was a reasonable breeze the boat felt OK, but probably slower than a standard Nethercott I would guess.
The wind perked up for the second pair of races, which were short back to back on a quadrilateral course. Suddenly remembered running down to the start that I'd forgotten to screw the bung in before lauching, but the boat didn't feel as heavy as one might have expected. There was nothing else out faster than an RS200, so both races took much the same course, first round every mark, and a respectablish (for me steering) mid fleet result.
I'm now pretty convinced the boat is easier to tack with the extra stern volume. It was windy enough to be overpowered frequently, although not really enough that I had to get to the downhaul and blade off the top of the sail. In those conditions I think I'd normally have one or two poor tacks, but they all seemed to come off OK, if some better than others... Once up to a good planing speed I also think the boat is faster: the stern wake is spectacularly flat.
30th Jan 2011
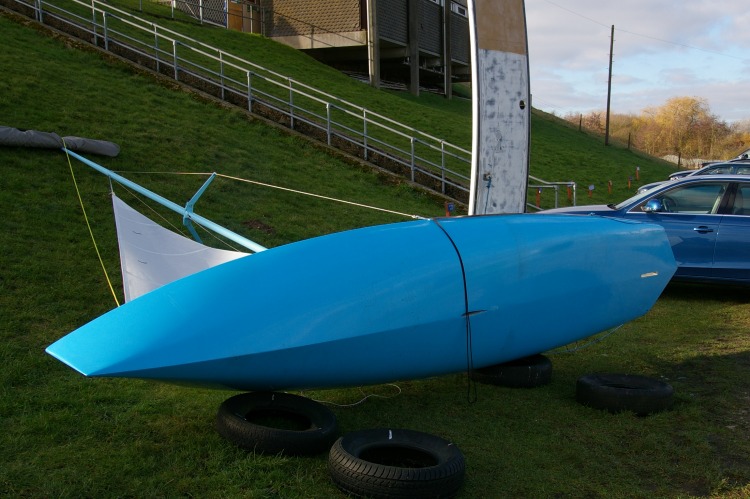
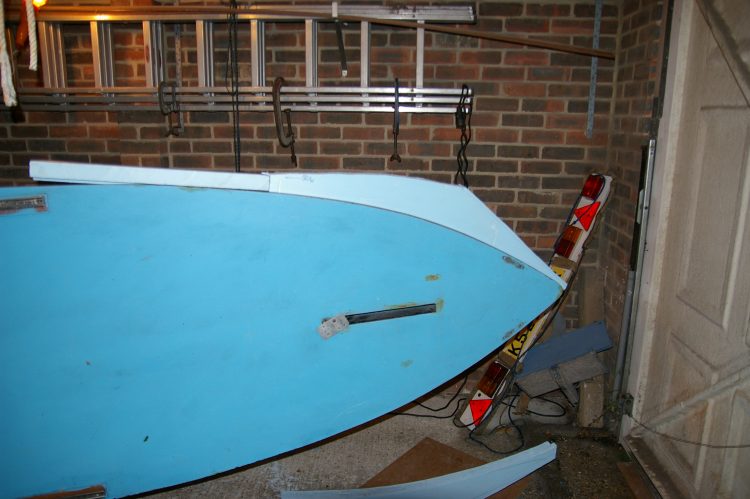
I finally got some paint on the boat: we had the coldest December for some years in the UK with plenty of snow and here you see the results.
Conditions F2/3, gusty, sailing poor - very rusty. I have a considerable snag list, which is only to be expected, but most of them are trivial things like shortening the retrieve elastic on the control lines so they don't go over the side, and sanding down some filler round the rudder case so the rudder fits more easily.
OK, so how does it feel... Well, to be honest it makes a lot more difference than I expected. The stern wave is very obviously lower and flatter, so I assume there is more pressure recovery going on. As Rob M predicted to me the bow is a good couple of inches lower when reaching, and I'm amazed its made so much difference. You can see the stern/chine digging into the water some when the boat is heeled, this is especially striking sailing upwind with windward heel, which I try and do. Water goes over the stern quite readily when heeled either way which is to be expected so more freeboard than a standard Nethercott would be preferred. This is especially true as the water hits the blocks on the corner for the retrieve elastic - what with that and the elastic dangling over the stern there was a lot of fuss going on there. I could just keep the boat flatter of course. At least one other club sailor reckoned that the boat was noticeably quicker, and although it was good conditions for the Canoe which may have affected his assessment I think this change has added performance in that wind strength, but of course that was always where it was likely to gain. Lighter winds are likely to be a weakpoint, and may be worse than I thought unless I try very hard to get weight forward: I suspect the corner of the stern is more likely to immerse than I thought.
Stability... I didn't think it was more stable when I was sailing, but on reflection I think she probably is. It was very gusty - a north easterly which isn't the stablest of breezes in this part of England. I was very rusty, and had to slip off the plank twice to avoid being teabagged, yet I don't recall any really ropy tacks so maybe there was a bit more steadiness. I certainly don't recall coming out of many tacks completely stalled and stationary, so maybe the volume is paying off in that respect.
It will be interesting to see what happens in real breeze. If the bow is going to stay further down then it seems likely there will be a need to slide the plank aft rather earlier than with the standard stern if I wish to avoid exploring the bottom of the reservoir...
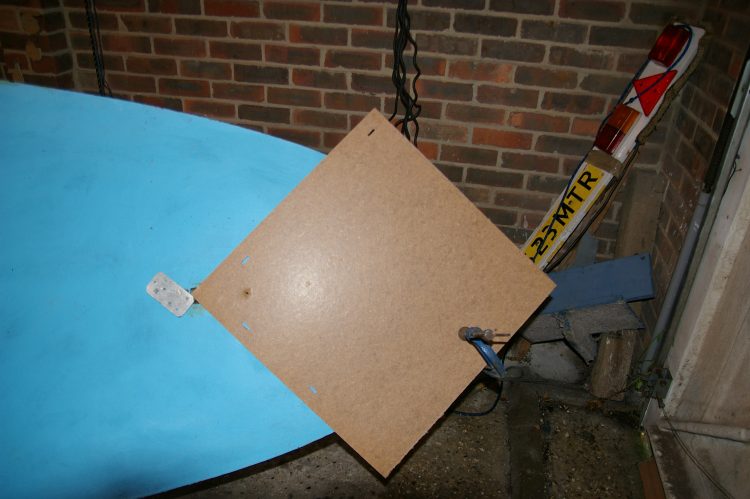
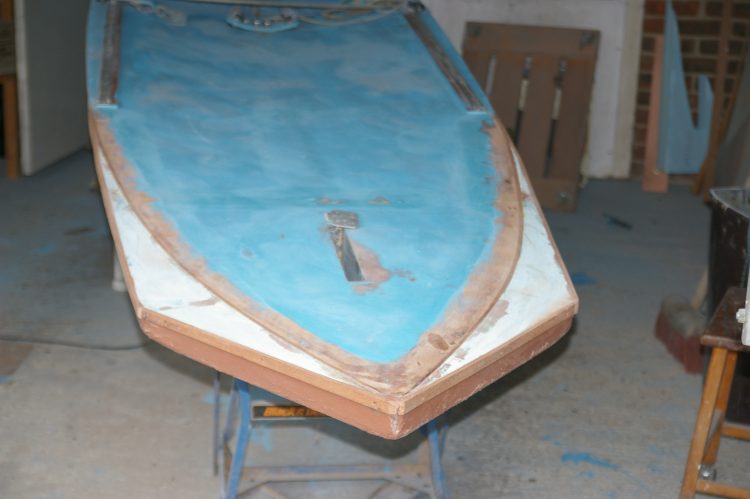
A square of hardboard is being used as the base template for the required 90 degree angle at the stern. I used that and some battens to make a template for the foam - Dow Floormate left over from the rebuild -and then started shaping it as well as I could to match up to the hull side. Leaving the existing wood gunwhale in place complicated this considerably, but one of the aims for this is to minimise the amount of work required to bring the boat back to the one design shape. I intend that it should just need saw, sander and paint to remove the excresences with no reconstruction required.
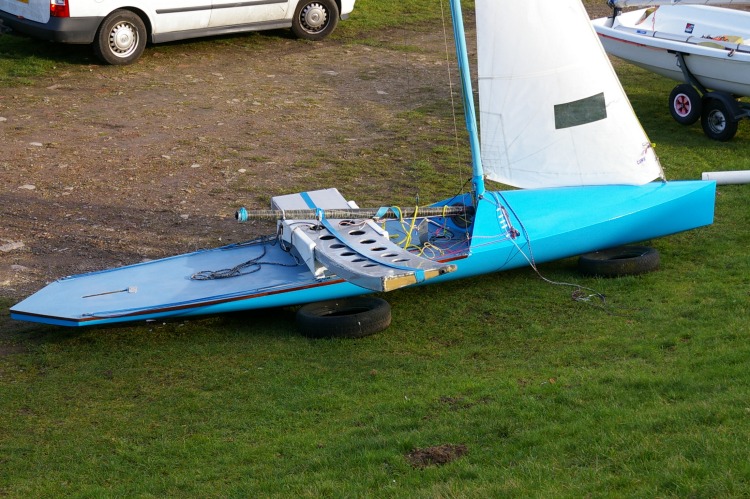
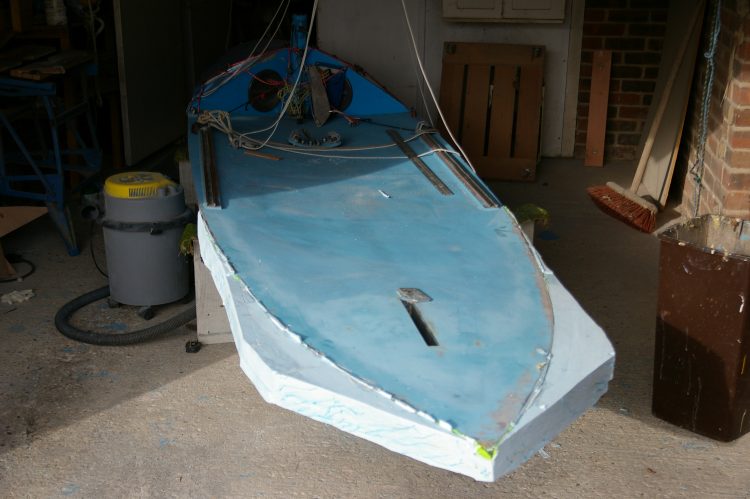
Here the foam has been glued in place. I did all 4 pieces at the same time, which was a mistake because it was a lot of trouble getting it to sit cleanly it the right location. The problem was in clamping it down, because any kind of inward pressure just made the foam slip down the topsides. Had there been time and patience then doing one side one day and one the other would have made for a better fit with fewer gaps. Parcel tape might have been a better option than sash cramps now I think of it.
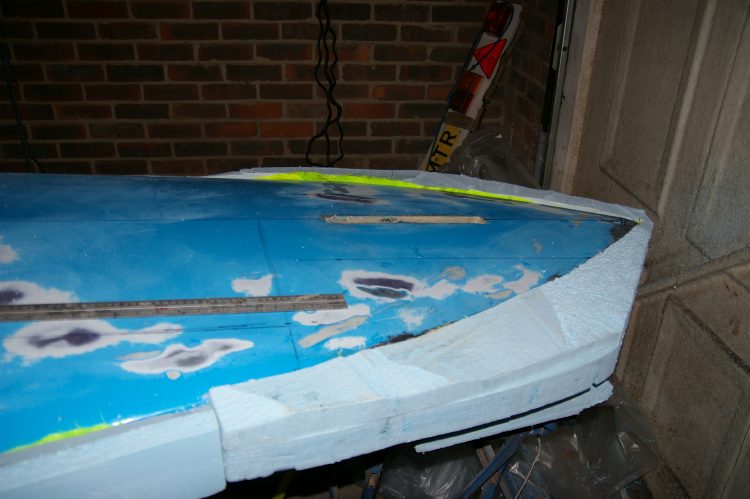
Note the green peel ply sticking out behind the foam. This is all part of the deconversion strategy. I soaked a piece of peel ply in resin and placed it on the hull each side before adding filled epoxy to glue the foam on. The idea is that when whoever deconverts this boat gets to work they can slice off the foam and then use the peel ply to get much of the rubbish off. Because I had so much trouble seating the foam blocks properly this isn't going to be as easy as I had visualised, but I hope it should be a big help.
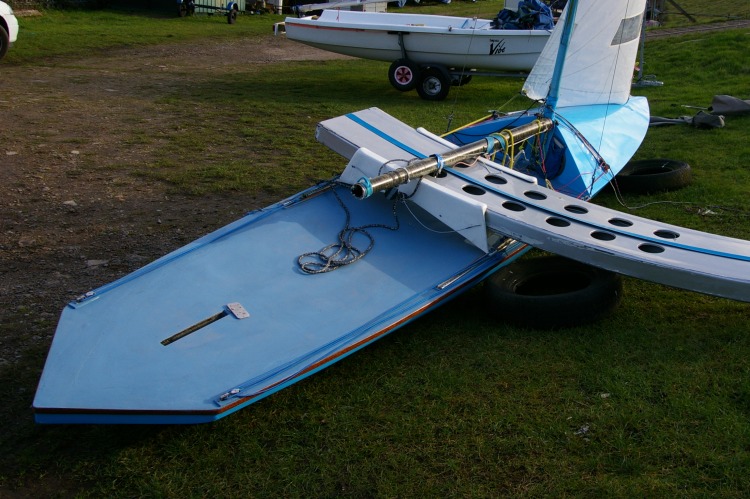
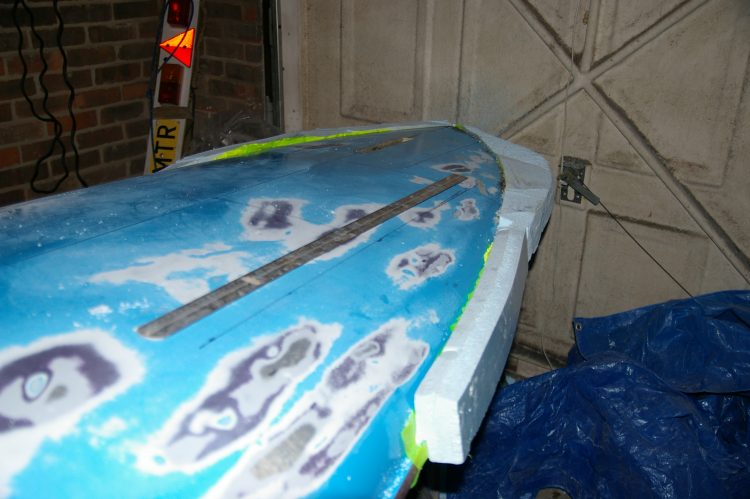
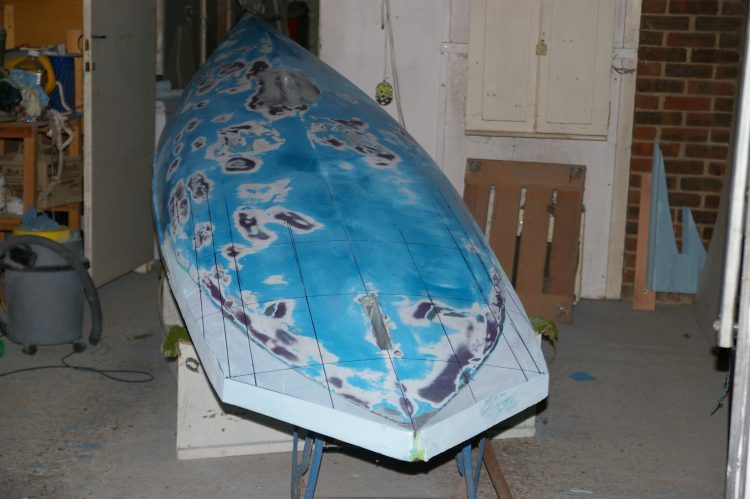
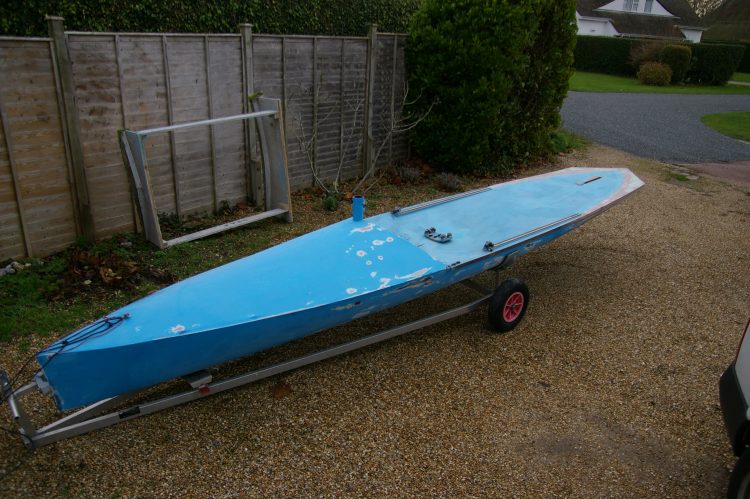
OK, now the tricky bit. Fairing the hull extensions. You can see the grid lines I drew on the hull to act as guidelines. What I've attempted to do is to just extend each guideline - technically they are buttock lines - in a straight line from the old hull, but it all got very complicated near the original chines where there is a lot of turnup. After these shots were taken I gave it a bit more turnup and softened up the chines. This was partially because I was having trouble getting a good transition, and partly to try and hide how wobbly my actual shaping was. It would probably be better to have sharp chines for spray release at speed, but on the other hand the soft chine might be better in light airs. On the whole I now think its wrong to have it like that, but it looked good at the time!
Not pictured is the next step which was to make templates of the horizontal sections in order to make the boat as symmettrical as I could. I suppose the best thing to do would be to start with the official designed shape and get it really accurately cut out onto thin ply as a full width template from gunwhale to gunwhale so you can make the shape correct to the millimetre. However there was no designed shape: its all shaped by eye and steel rule, and so I settled for raiding the cardboard recycling bin at the back of Tescos for some large cardboard boxes and cut out a template to match the better looking side from chine to the first buttock line on the other side and shaped the other one as well as I could to match. The areas of greatest curvature by the "chines" were the most difficult part to get anything approaching symmettry. The idea of making the template run from the first buttock line, which was unchanged, was that it would be easier to get the template positioned correctly. Gunwhale to gunwhale templates, on reflection, would have been much more accurate.
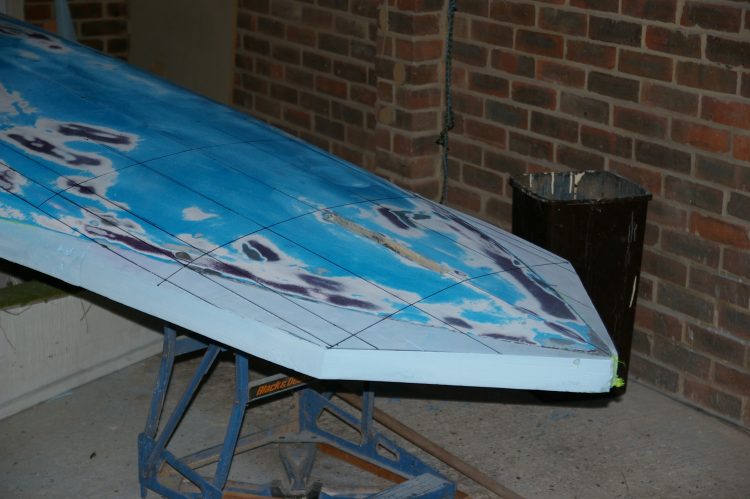
On reflection I should have a rounded off corner, not a sharp one between "transom" and "topside" to be in better accord with the spirit of the rule. This was a lot easier to shape though and its not as if there's any serious risk of winning any championships...
Parcel tape is the poor man's - or at least under-equipped man's - vacuum bagging. There are two layers of 200gsm glass over the outer skin of the hull extension, laminated up wet, then peel ply, then parcel tape is used to consolidate it as well as possible. Over this sort of area (or less) its pretty satisfactory, but I don't know that I'd want to try it if I were building a complete hull. For that I strongly recommend begging or borrowing a vacuum pump and a friend with experience of using it.

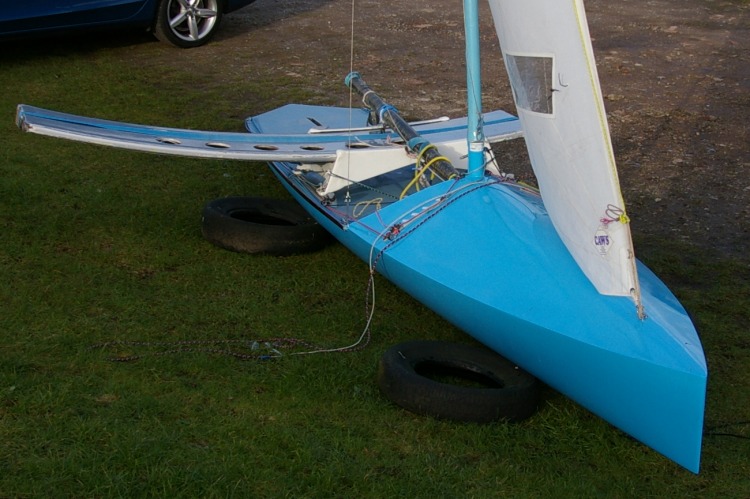
In these the parcel tape is off and I've glued gunwhales/rubbing strips along the sides. Between races the boat sits tied up against a not especially delicate pontoon so the extra protection is essential. At this stage I was still planning on plywood deck patches which would cover both the old rubbing strip - still in place - and the new one and which would be raised above the current deck level by the thickness of the ply.
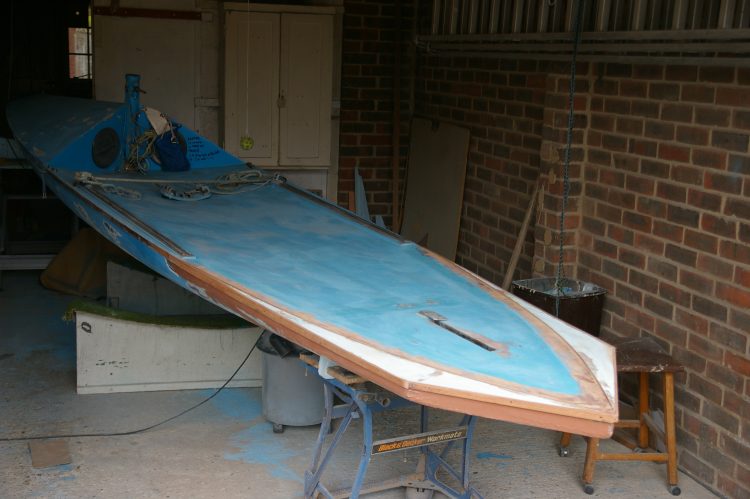
However I didn't have any odd bits of the right plywood the right size and didn't feel like buying any. So I thought "bother it - I've plenty of spare glass" and just put three layers of 200gsm glass across the foam and with about a two or three inch overlap onto the existing deck. Not the best of solutions: it would be much better to have had the glass going onto the hull and the gunwhale over the overlap, but I wasn't going to take things off again. This is, after all, basically a temporary experiment.

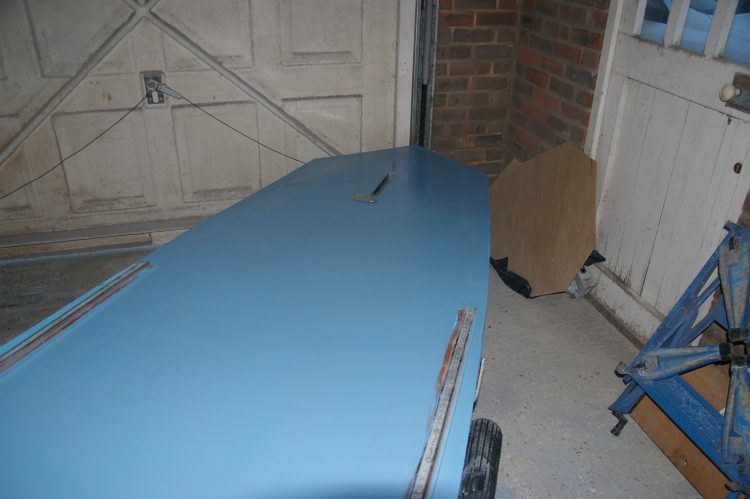
And here's a bit of paint on the deck. The wrong colour paint. Oh well, I'm not going to chuck it out because its the wrong colour. You can just see the line where the glass overlaps the ply. I wasn't going to spend immense amounts of effort and filler in getting a really smooth transition.
I checked (thanks Rob!) the rules, and realised that my pseudo transom stern was verging on a bit too pseudo transom.The rules require a minimum 60mm radius of in the sheer line. When I cut out a piece of cardboard with the required radius it looked worryingly large, but when I put the template against the actual boat it turned out to be no problem at all. Indeed the actual hull skin has a radius of around 60mm on the "transom"/topside corner, so I'm well within the spirit of the rule as well as the letter.